Get your Togo site up and running on your own
We recommend configuring Togo on a fresh WordPress installation in a local or testing environment before attempting to use on a production website.
Installation and Setup for Togo WordPress Theme
This guide assumes you already have a working WordPress installation
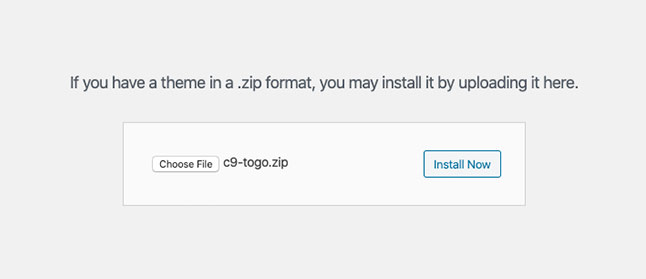
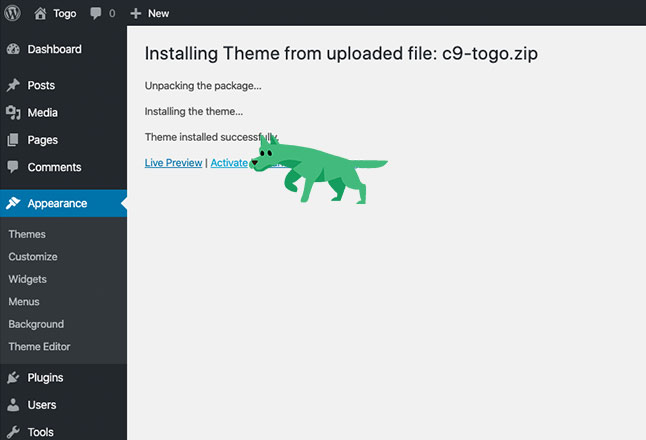
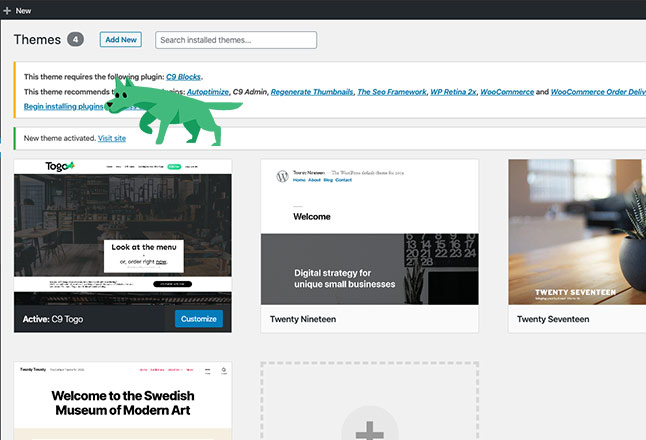
Togo the doggy is here to guide you.
1/17
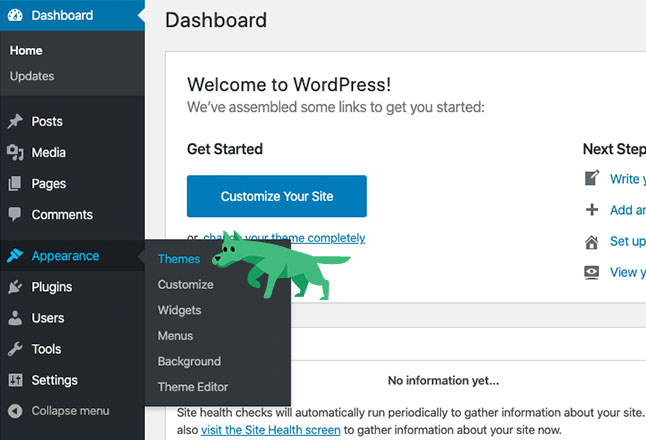
2/17
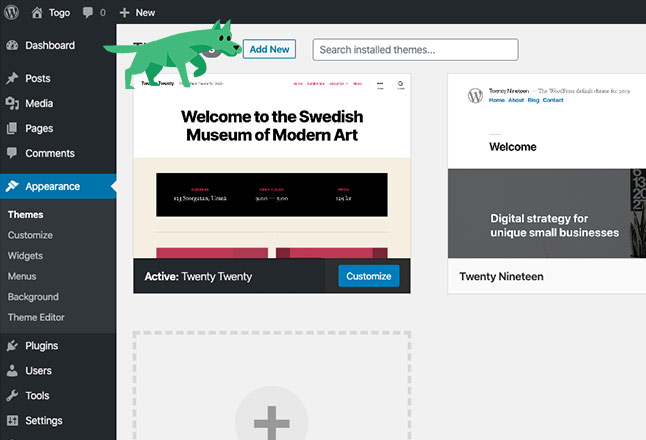
3/17
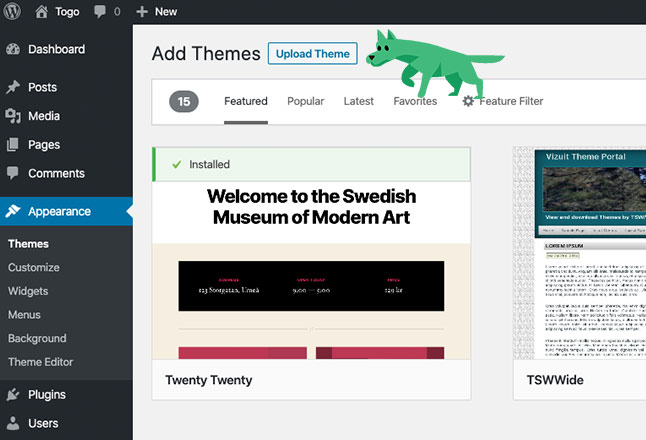
4/17
5/17
6/17
7/17
8/17
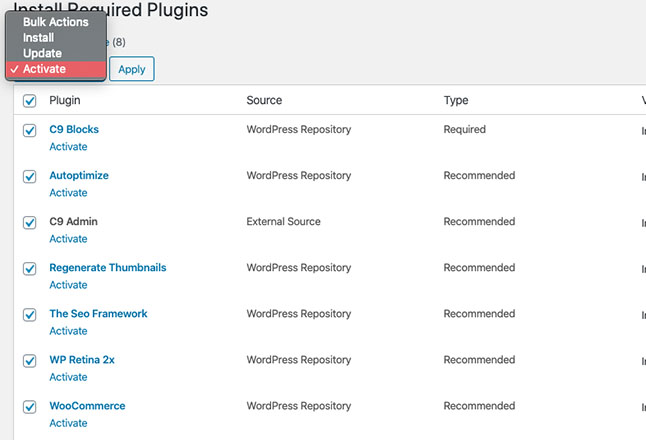
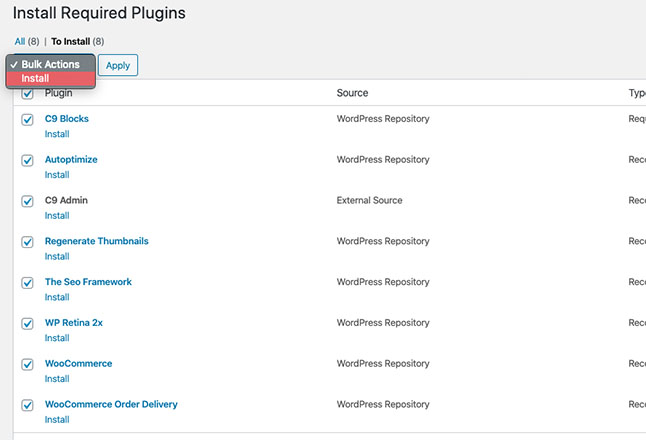
Select the top checkbox to bulk activate your plugins.
9/17
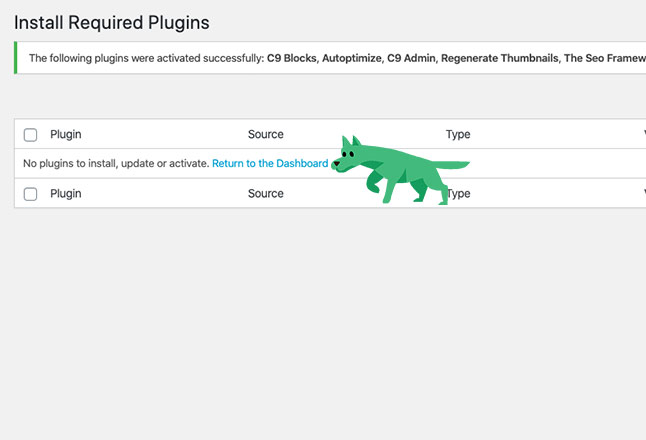
10/17
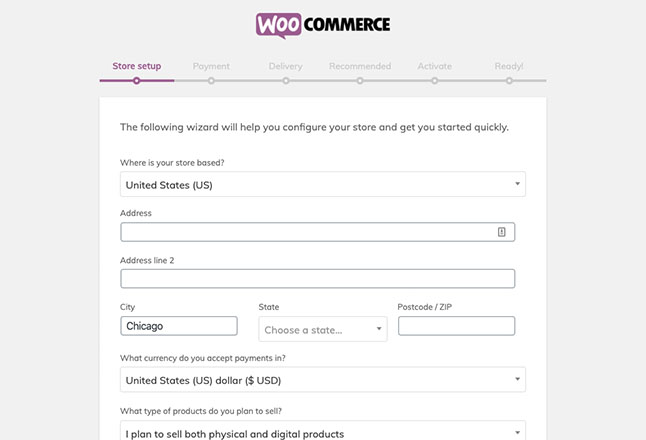
11/17
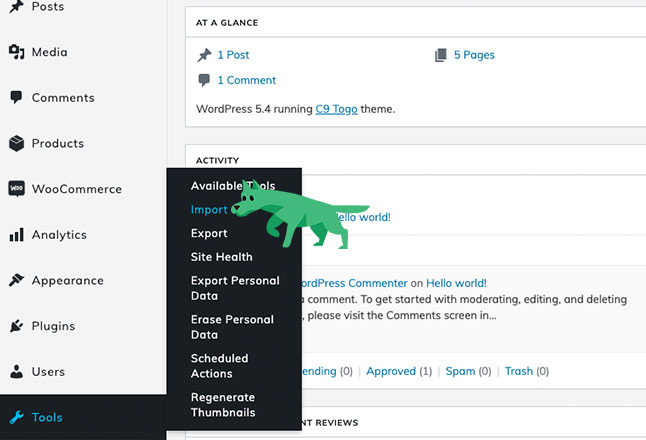
12/17
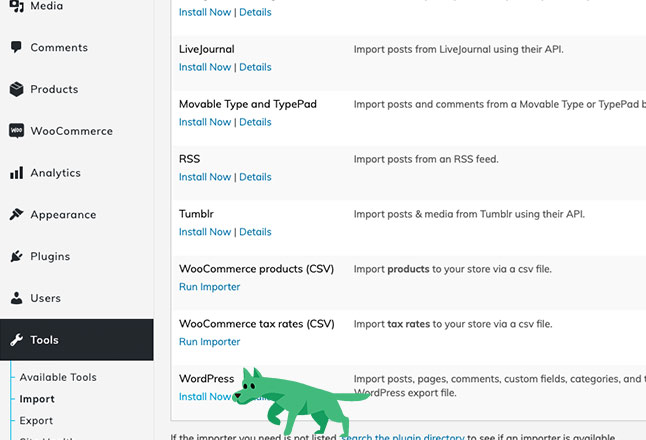
13/17
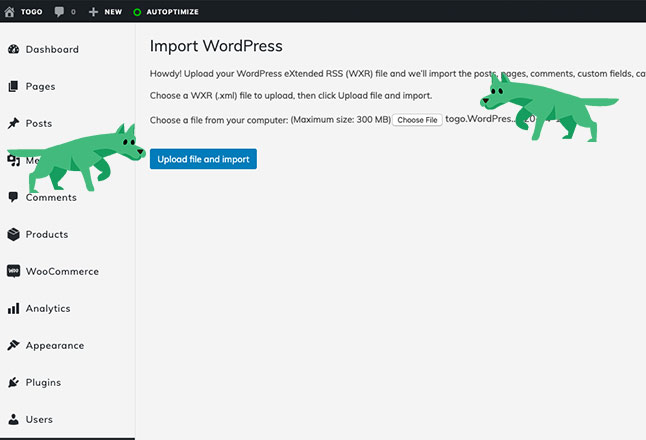
14/17
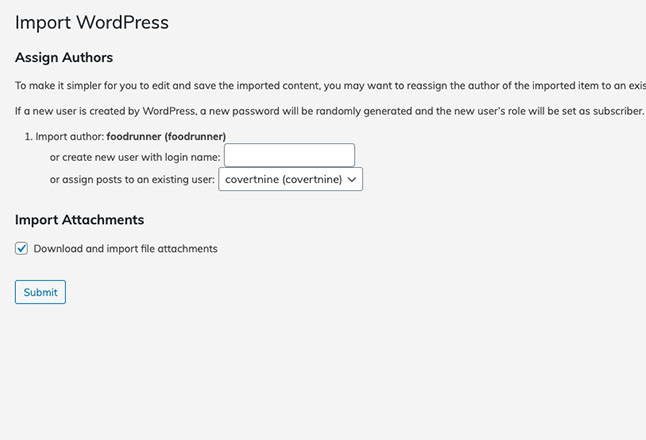
15/17
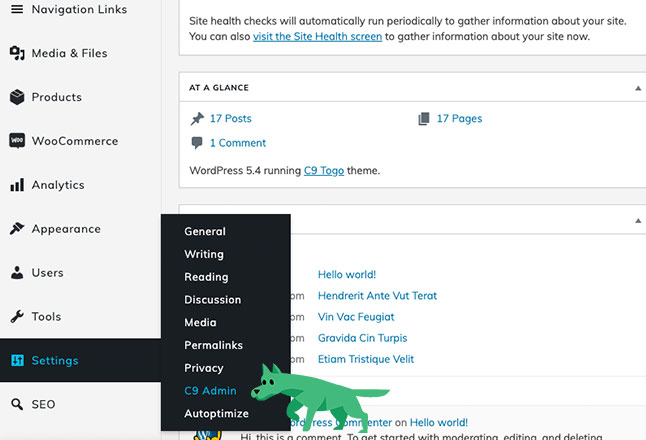
16/17
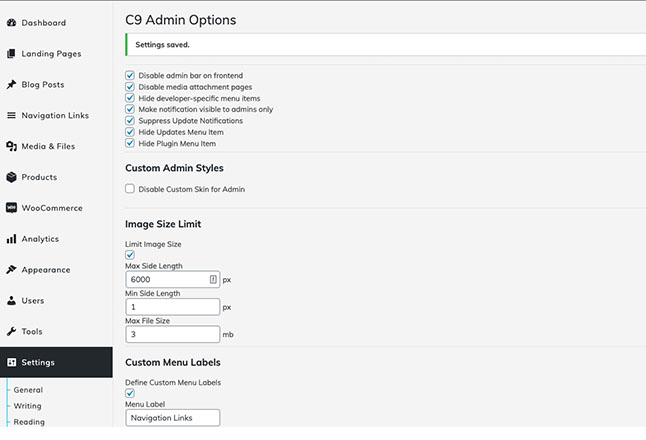
17/17
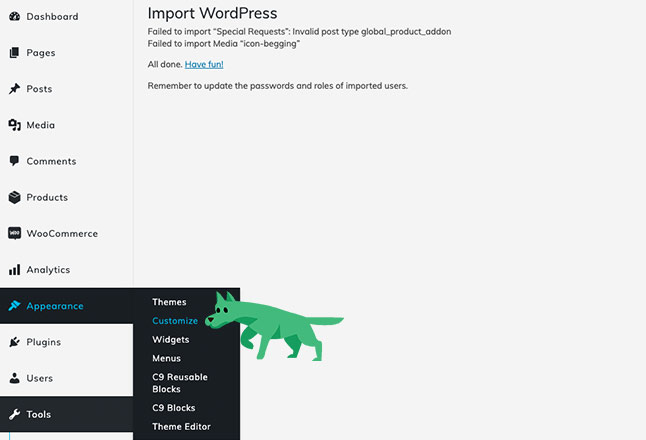
Continue below to read more about customizing your online ordering store with plugins like a minimum order plugin, or you can skip to adding your logo, tagline, and social media information.
Customizing Your Togo WordPress Website
Time to make it “you” with content, your logo, and custom settings
Now that the theme is setup, what’s next? Customizations.
The last few steps to setting up your delivery and online ordering depend on your individual needs. We’ve recommended a few plugins to install after you’re done activating and setting up your theme including plugins for SEO, date/time for delivery selection, and a few other useful utilities for WordPress.
Additional WordPress Plugins
In our demo store, we installed a few additional plugins detailed below that you may find help you, that aren’t included in the theme by default typically.
- Leave At Door for WooCommerce by Amplify Plugins
- WooCommerce Product Addons (Premium plugin for checkboxes on product pages)
- WooODT Lite Delivery or Pickup Time (For order pickup/delivery times in checkout)
- WooCommerce Minimum Order Amount (For setting order minimums on delivery)
WordPress Customizer Settings
There are a multitude of ways to customize the look and feel of your Togo site. The best place to start is from within the Customizer of your WordPress admin should you want to customize the fonts, logo, sidebars, and social links on your theme. You can also enter in custom CSS, and a tracking code for Google Analytics from within the customizer
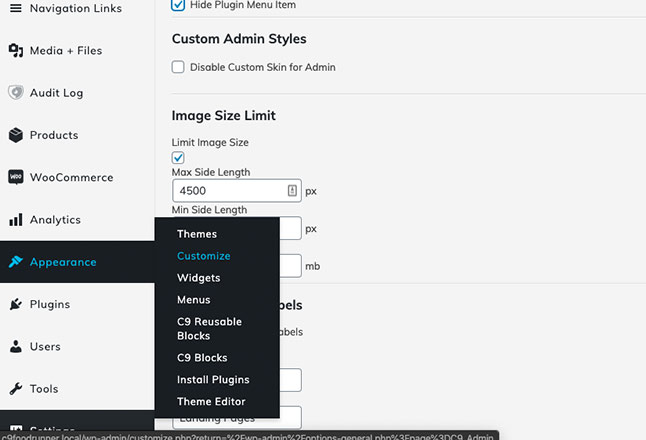
From the WordPress Admin goto Appearance > Customize
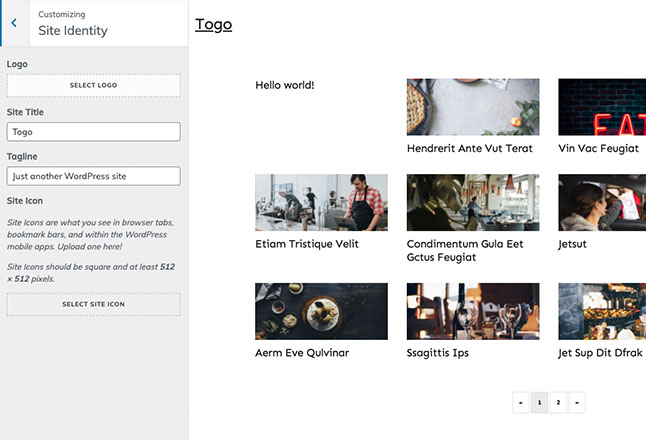
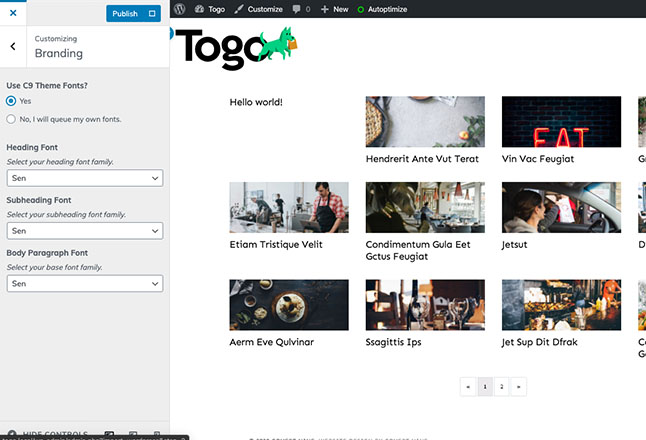
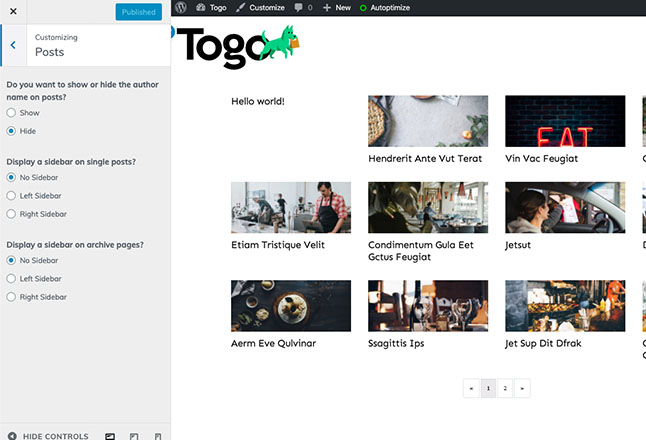
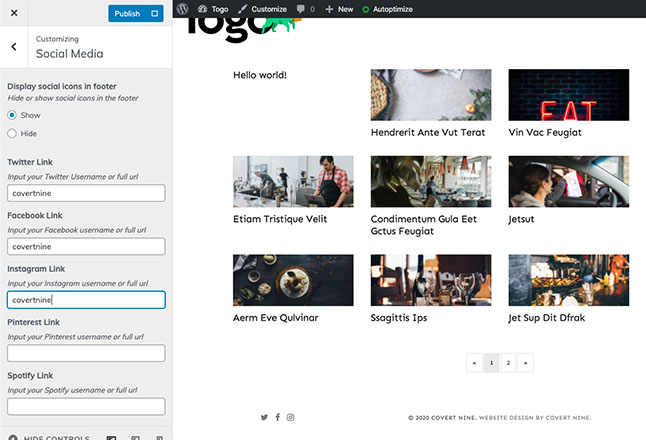
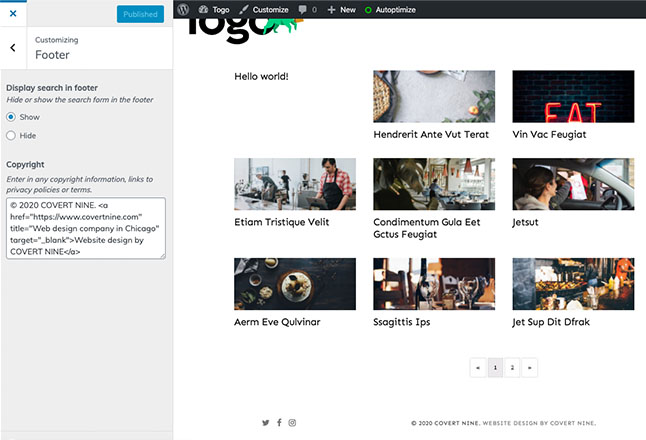
Some of the available settings in the customizer. (Screenshots below) One important note is that some of the settings will not display in the customizer. To see your site when you’re done making changes, exit out of the customizer and view your site frontend link.
- Site Identity – Edit your site logo, title, tagline, and site icon for the browser icon and bookmark image. We recommend a SVG images for logos and site icons
- Branding – Use the default fonts or pick your own Google fonts
- Posts – choose whether or not to display widgetized sidebars on Posts, Archive pages, and whether or not to display author information on blog posts
- Social Media – enter links for social media accounts for your venue that show up in the site footer
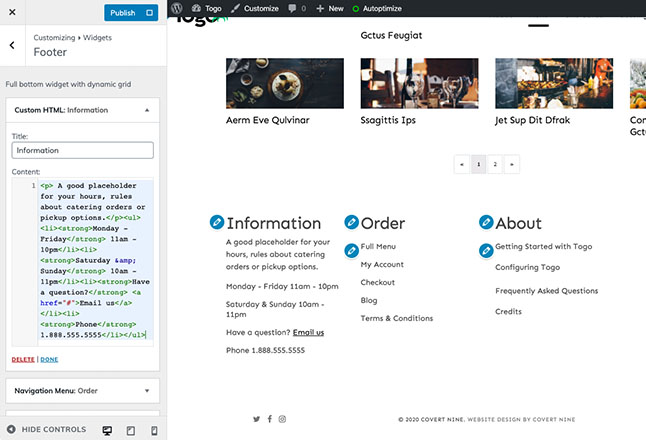
- Footer – Hide or show the site search in the footer, and enter a copyright message to display on the site on every page
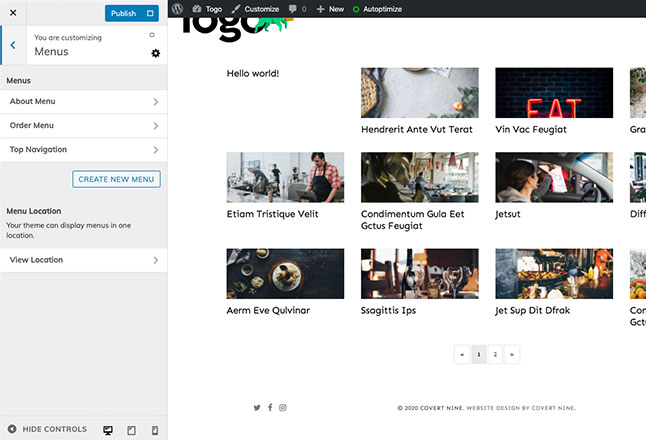
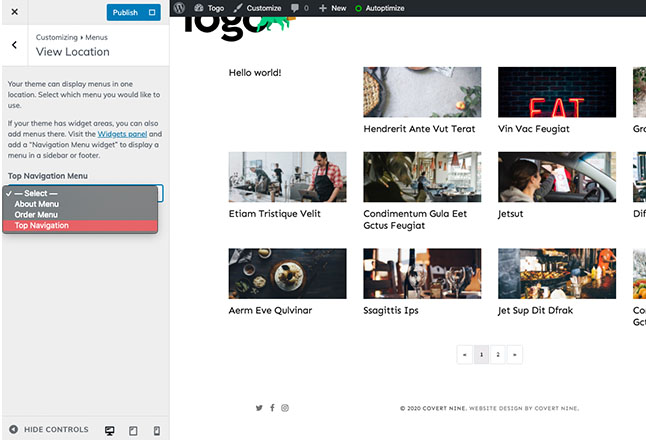
- Menus – Add the menu you imported during the setup process or make your own custom menus for the footer like we did in the site demo
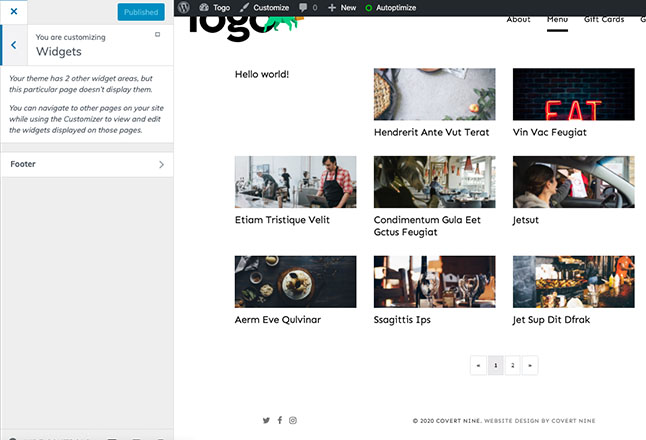
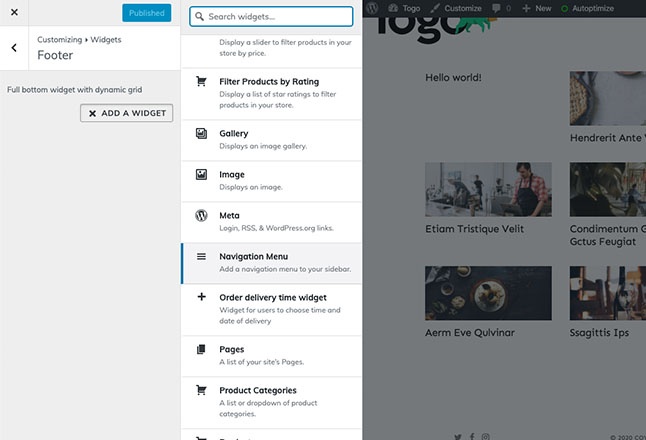
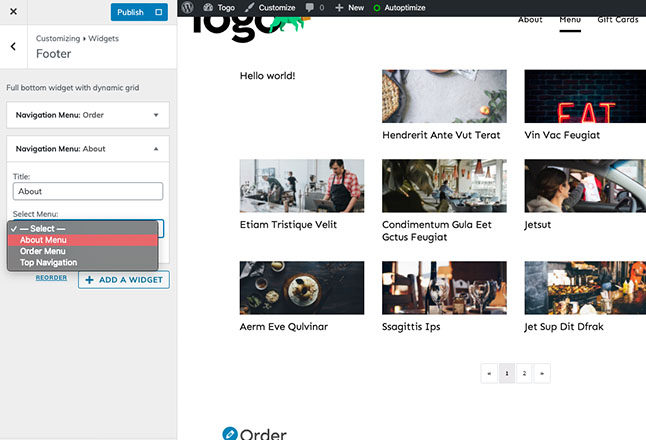
- Widgets – Assign sidebar widgets should you choose to use those on your blog posts page or archive page, and assign widgets to the universal site footer.
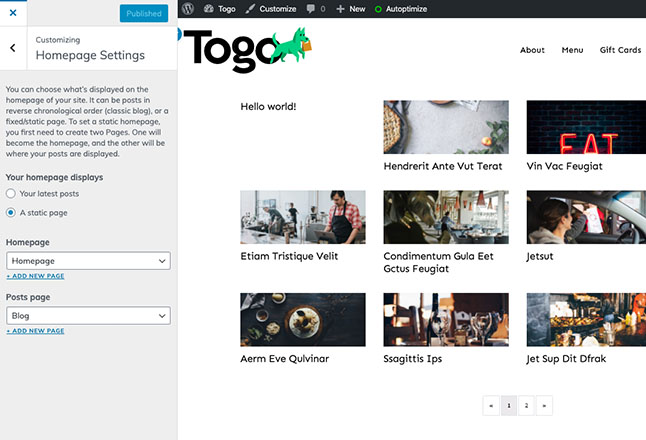
- Homepage Settings – Set a custom homepage and a default blog posts page. We recommend setting up a static home page as we have in the Togo site demo.
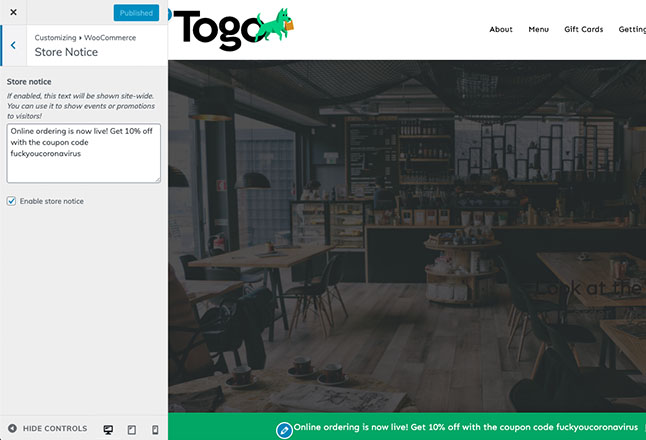
- WooCommerce – Customize settings related to WooCommerce including activating or deactivating the Site Notice, changing image thumbnail sizes, product catalog settings, or checkout settings
- Additional CSS – drop in any custom CSS you’d like added to the site to change the design, layout, or for any style edits
The step by step walk through below will outline the exact settings you’ll need to get the demo site set up the same way we did.
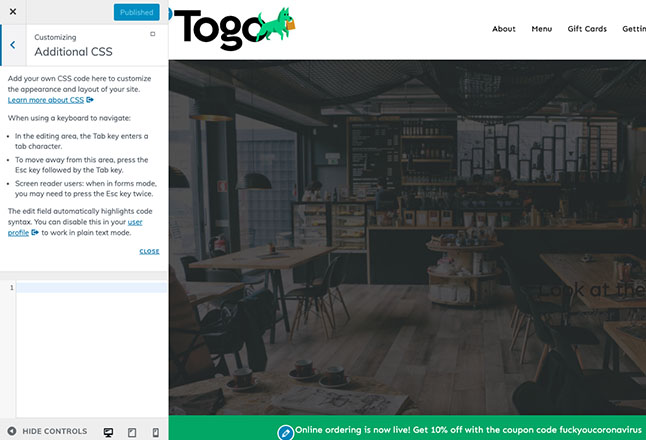
Customizing with a child theme, client folder, or inline CSS
If you’re an advanced user or developer, you may want to make your own customizations to the theme and plugins. Togo was built using the C9 Starter Theme, a client folder boilerplate, and the C9 Blocks plugin.
For simple changes to colors or minor tweaks, you can utilize the Appearance > Customizer settings under Custom CSS. Togo also supports child themes.
Detailed documentation for working with our themes and plugins are included, with some additional helpful links below:
Method #1 Begin with a page template.
Then replace images and text with your own menu blocks from WooCommerce products or using the block editor in WordPress
To use a pre-built landing page for your menu, click on the C9 Blocks feather icon and select “Page Templates”
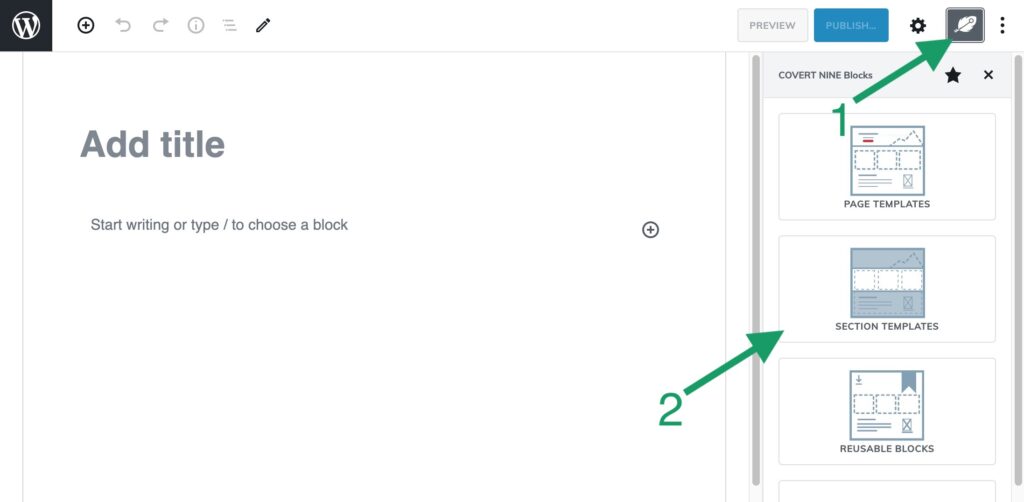
Select the “Restaurant Style Menu” template
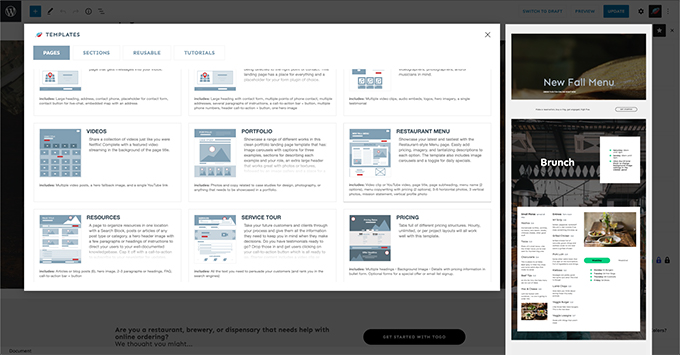
Start editing the menu links.
Method #2 Begin with section templates to build your menu page.
Then replace images and text with your own.
First, click on the COVERT NINE Blocks feather icon and select “Section Templates”

Scroll down and select a template.
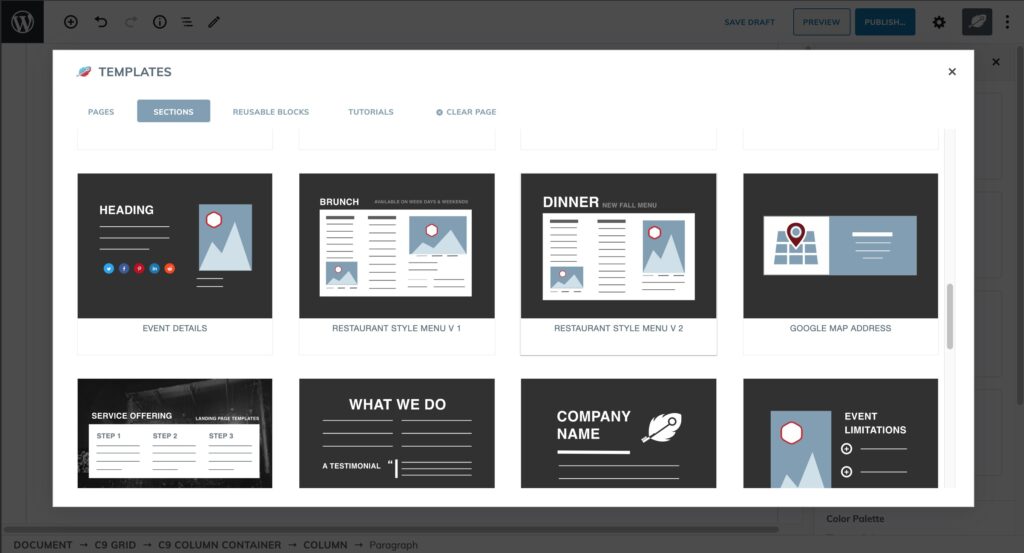
Repeat this process to add as many section templates as you need on the page. Then, start editing!
Method #3 Take a design of your own and create it from blocks.
There are loads of block templates from which to choose, and sample content for the theme can also be imported from Togo’s demo website.
- WooCommerce Product Blocks: A set of blocks that come with the WooCommerce plugin that you can sort by popular, category, tag, or select specific products to display as we have on the Togo Homepage.
- C9 Grid: Arguably one of the most powerful, and complex responsive blocks with background video, image, and overlay support. All blocks should be placed in C9 Grid blocks so your site is responsive for mobile devices
- C9 Heading: Heading blocks with the ability to override font sizes, styles, and a subheading powered by Bootstrap classes
- C9 CTA Bar: A responsive call-to-action bar with a button that can link to an email sign up or buy page with alignwide and alignfull support
- C9 Vertical Tabs: Vertical set of tabs that stack on mobile with full accessibility compliance from Bootstrap
- C9 Horizontal Tabs: Horizontal tabs that scale down on mobile for clear and concise information on any screen size
- C9 Toggles: Two styles of toggles for hiding information behind a click or a heading.
- C9 Image Carousel: Responsive slider for images with captions and subheadings. Change the animation speed, auto paging, and the display of arrows and indicators
- C9 Post Grid: Display a grid of posts, pages, or any custom post type in WordPress, with a wide range of filters and settings for exactly what you want to display in a responsive grid
- C9 Carousel: A responsive slider carousel that can go inside of any C9 Grid element. Make a slider of logos, built in WordPress blocks like galleries, paragraphs, media & text, or videos
- C9 Social Share: A simple set of social sharing buttons that utilize the FontAwesome 4.7 icon set. Buttons links are pre-configured for popular social networks.
- + many more
Additional Documentation
- C9 Blocks Overview
- C9 Blocks + Theme Documentation
- WooCommerce Product Blocks
- WooCommerce Documentation
- Leave At Door for WooCommerce by Amplify Plugins
- WooCommerce Product Addons
(Premium plugin for checkboxes on product pages) - WooODT Lite Delivery or Pickup Time
(For order pickup/delivery times in checkout) - WooCommerce Minimum Order Amount
(For setting order minimums on delivery)
WordPress Tutorials
- C9 Blocks YouTube Channel
- Building Responsive Landing Pages with C9 Grids
- Building Landing Pages From Templates
- Using Reusable Layouts (Saved Layouts)
- YouTube WooCommerce Tutorial 2020
(Complete walk video of WooCommerce plugin, product entry, and inventory management)
Still stuck or need some guidance? We’re a Chicago-based team that coded and designed this entire site from scratch. Let us help you out!
